
티스토리 뷰
# 목표
- Discord 내에 봇을 추가하고 Offline -> Online
# 요약
원래 목적은 1, 2까지였으나.. 하는김에 클라우드 서버에 배포까지 진행하도록 함.
1. 준비
> Discord 개발자 페이지에서 봇 생성 후 (Client ID, Secret Key) 발급
2. 간단한 예제 생성
3. 이후.. 서버 생성, 배포 등..
#1. 준비
(1) Discord 개발자 페이지
- 개발자 페이지 : https://discordapp.com/developers/applications/
Discord Developer Portal — API Docs for Bots and Developers
Integrate your service with Discord — whether it's a bot or a game or whatever your wildest imagination can come up with.
discordapp.com
- 애플리케이션 생성

- Client ID & Secret Key 생성

- 봇 초대하기
봇 초대 URL : https://discordapp.com/developers/applications/(생성된 Client ID)/bots


단, 봇은 생성되었으나 아직 서버를 구현하지 않았기때문에 Offline 상태.
이후 부분에서는 서버 구현 내용을 다룸.
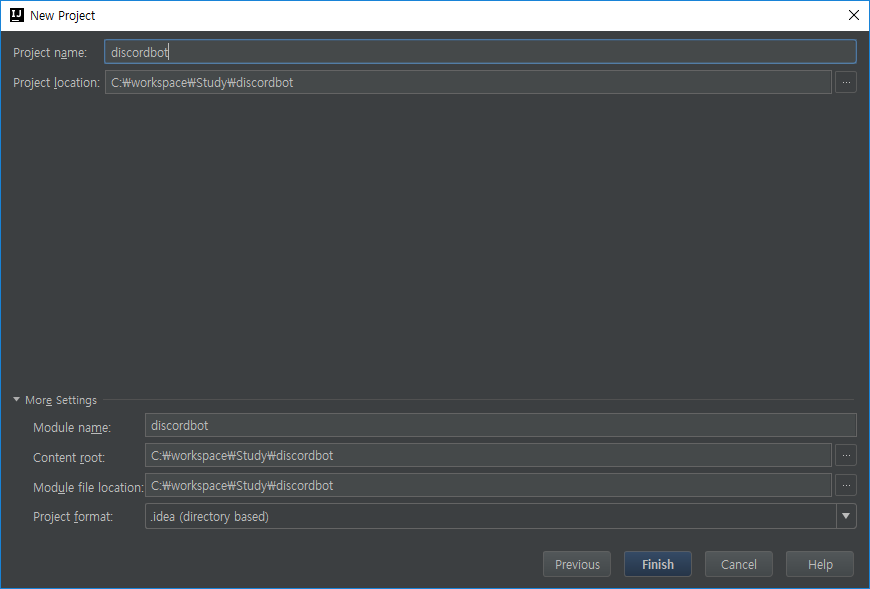
#2. 프로젝트 생성


- Main.java
package com.bot.discord.controller;

import net.dv8tion.jda.core.AccountType;
import net.dv8tion.jda.core.JDA;
import net.dv8tion.jda.core.JDABuilder;
import net.dv8tion.jda.core.OnlineStatus;
import net.dv8tion.jda.core.exceptions.RateLimitedException;

import javax.security.auth.login.LoginException;

public class Main {
    public static void main(String[] Args) throws LoginException, RateLimitedException, InterruptedException{
        JDABuilder builder = new JDABuilder((AccountType.BOT));
        builder.setToken(Args[0]);
        builder.setAutoReconnect(true);
        builder.setStatus(OnlineStatus.ONLINE);
        JDA jda =  builder.buildBlocking();

    }
}
- pom.xml
<?xml version="1.0" encoding="UTF-8"?>
<project xmlns="http://maven.apache.org/POM/4.0.0"
         xmlns:xsi="http://www.w3.org/2001/XMLSchema-instance"
         xsi:schemaLocation="http://maven.apache.org/POM/4.0.0http://maven.apache.org/xsd/maven-4.0.0.xsd">
    <modelVersion>4.0.0</modelVersion>

    <groupId>DiscordBot</groupId>
    <artifactId>DiscordBot</artifactId>
    <version>1.0-SNAPSHOT</version>

    <repositories>
        <repository>
            <id>notfab</id>
            <url>http://nexus.notfab.net/content/repositories/JDA3</url>
        </repository>
        <repository>
            <id>jcenter</id>
            <name>jcenter-bintray</name>
            <url>http://jcenter.bintray.com</url>
        </repository>
        <repository>
            <id>central</id>
            <name>bintray</name>
            <url>http://jcenter.bintray.com</url>
        </repository>
    </repositories>

    <dependencies>
        <dependency>
            <groupId>net.dv8tion</groupId>
            <artifactId>JDA</artifactId>
            <version>3.8.1_439</version>
        </dependency>
    </dependencies>

    <build>
        <!--resource folder-->
        <resources>
            <resource>
                <directory>src/main/resources</directory>
                <filtering>true</filtering>
            </resource>
        </resources>
        <plugins>
            <plugin>
                <groupId>org.apache.maven.plugins</groupId>
                <artifactId>maven-compiler-plugin</artifactId>
                <configuration>
                    <source>1.8</source>
                    <target>1.8</target>
                </configuration>
            </plugin>
            <plugin>
                <groupId>org.codehaus.mojo</groupId>
                <artifactId>exec-maven-plugin</artifactId>
                <version>1.6.0</version>
                <configuration>
                    <mainClass>com.bot.discord.controller.Main</mainClass>
                </configuration>
            </plugin>
        </plugins>
    </build>

</project>
> 코드에 대한 자세한 설명은 다음 글에서 ..
#3. 클라우드 서버
- 배포할 서버는 네이버 클라우드 플랫폼을 통해 리눅스 서버를 생성하고 해당 서버에 배포함.
- 클라우드 서버 생성 가이드 : https://hoonjo.tistory.com/9
[기타] 네이버 클라우드 플랫폼 - 서버 생성 및 사용
#1. 클라우드 플랫폼 대시보드 URL : https://console.ncloud.com/dashboard NAVER CLOUD PLATFORM cloud computing services for corporations, IaaS, PaaS, SaaS, with Global region and Security Technology C..
hoonjo.tistory.com
- 클라우드 서버 공인 IP 생성 가이드 : https://hoonjo.tistory.com/12
[기타] 네이버 클라우드 플랫폼 - 공인 아이피 신청
#1. 공인 IP 신청
hoonjo.tistory.com
#4. 서버 설정
- JAVA, Maven, MySQL 설정 가이드 : https://hoonjo.tistory.com/11
[기타] 서버 설정
목적 : 테스트 코드 배포와 디스코드 봇 실행을 위한 서버 셋팅 #1. JAVA 설치 #2. Maven 설치 #3. MySQL 설치 #1. JAVA 설치 > 설치 : yum install java-1.8.0-openjdk-devel.x86_64 > 확인 : java -version [ro..
hoonjo.tistory.com
#5. Git
- Repository 생성 및 최초 커밋 가이드 : https://hoonjo.tistory.com/10
[기타] Git 연동
#1. Git Repository 생성 주소 : https://github.com/new Build software better, together GitHub is where people build software. More than 40 million people use GitHub to discover, fork, and contribute..
hoonjo.tistory.com
#6. 실행
- 실행할 코드 다운로드
[root@discord-bot-test ~]# git clone https://github.com/johoonx2/bot_test.git ./repositories/bot_test
Cloning into './repositories/bot_test'...
remote: Enumerating objects: 14, done.
remote: Counting objects: 100% (14/14), done.
remote: Compressing objects: 100% (5/5), done.
remote: Total 14 (delta 0), reused 14 (delta 0), pack-reused 0
Unpacking objects: 100% (14/14), done.
[root@discord-bot-test ~]# cd repositories/bot_test/
[root@discord-bot-test bot_test]# ll
total 8
-rw-r--r-- 1 root root 2065 Dec 19 18:39 pom.xml
-rw-r--r-- 1 root root   22 Dec 19 18:39 README.md
drwxr-xr-x 3 root root   17 Dec 19 18:39 src
[root@discord-bot-test bot_test]#
- 실행에 앞서 실행할 봇의 토큰값 확인

- 실행 전 Offline임을 확인

- 실행 : mvn -X clean install exec:java -Dexec.args="토큰"
- 실행 후 Online 상태임을 확인 - 여기까지 된다면 완료!

- 다음 글에서는 Discord Bot에서 간단하게 입력을 받고 처리하는 기능을 구현하도록 한다.
- Total
- Today
- Yesterday
- mysql
- Vampire Survivor
- GO
- krafterspace
- 뱀파이어 서바이벌
- 지갑 생성
- pharser
- go lang
- 뱀파이어 사바이벌
- 모니터 설정
- Linux
- phaser3
- remote-ftp
- node
- P3X Redis UI
- phaser
- nodejs
- 이더리움
- 채굴
- node.js
- 민팅
- 몽고db
- 이더리움 채굴기
- pharser3
- 회원 탈퇴
- 네이버 클라우드 플랫폼
- OpenSea
- mongodb
- 비트코인
- minting
| 일 | 월 | 화 | 수 | 목 | 금 | 토 |
|---|---|---|---|---|---|---|
| 1 | 2 | 3 | 4 | 5 | 6 | |
| 7 | 8 | 9 | 10 | 11 | 12 | 13 |
| 14 | 15 | 16 | 17 | 18 | 19 | 20 |
| 21 | 22 | 23 | 24 | 25 | 26 | 27 |
| 28 | 29 | 30 | 31 |